![]()
Email:
me
![]()
Delco Alternator conversion for a Spitfire
(a job now completed)
(this page last edited Wednesday,
January 22, 2014)
Note: This page will take some time to load
as to the large size of the photos!
Please be patient!
![]()
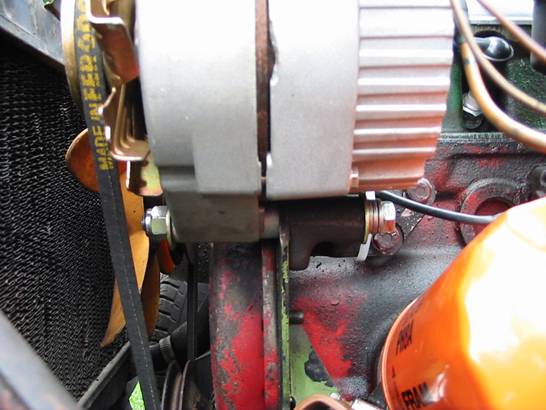
Photos below are of the original Lucas
alternator in place. It has given me no
problems that I know of. Perhaps we'll
find I had some once the Delco alternator is installed! I'm hoping my turn signals will blink faster
as described below by Michael!
Note that the fan belt is not in place. These photos were taken while replacing the
belt I had used for 15+ years which was always very loose and which I always
suspected of slipping. I took the belt
to Pep Boys and using the self-service size gadget, bought a belt that allowed
the proper tension when the alternator was almost at the furthest
adjustment. This is important for access
to the #1 spark plug. I didn't test this
yet. Keep your fingers crossed!
Note that this 1974 Spitfire is fitted with a
1968 1300+cc (modified) Mk3 engine to which is mounted the alternator from the
1974 1500cc engine I took out. (Actually, I must have replaced the alternator
at some point as it has openings for 2 separate connectors. I had modified the wiring and connected only
2 of the 3 wires in my harness to the Lucas unit. I must have a Lucas in my family tree!)
I am using a Delco alternator from my 1979
Camaro Z-28 as a guide for this conversion.
Project delayed
NOTE!
Well, I finally got the job done today,
The mounting bracket, a cast iron piece, was
drilled out to fit a 3/8” bolt as was used on the Delco. The swivel hole is that dimension. I bought a 4.5” bolt for that
application. It’s a tad too long, so I
bought 3 lock washers and 2 flat washers and a locknut to finish it off. Inserting the bolt from the distributor side
with a flat washer and the 3 lock washers on the head-end, it goes thru the
cast iron bracket, front engine plate, swivel flange on the Delco, another flat
washer and then the locknut.
Perfect! About one thread
protruding from the locknut.
I didn’t grind anything off the alternator
and used an alternator adjusting piece (flat with a slot for adjustment) I
picked up in the junkyard. I shimmed it
off the water pump housing about a half inch with some thick round washers
(what they really are is another story).
The fan belt lines up perfectly without any adjustments fore or aft. I used
an appropriately (1/2”) longer bolt to attach these items to the water
pump. Neverseize
the threads!
I was lucky to have just the right fan belt
so now I have perfect access to the #1 spark plug.
I connected the wires per #8 and #9 below.
Just for kicks in the process, I didn’t
attach the little brown wire, as I hadn’t used this on the Lucas
alternator. I started the car and
monitored the voltage at around 12. I
connected the little brown wire and the idle immediately went down a bit, the
engine seemed to be working somewhat and the voltage went to 14.4 demonstrating
that maybe Lucas wasn’t the real problem here.
I tried the turn signals and headlights.
The turn signals have suddenly come to life and the headlights don’t
look like daytime running lights anymore!
Big DUH! Voltage stable at 14.4
all the while. My old Spitfire had a
voltage gauge, perhaps I should install one in this car also!
I then took a 50 mile ride to charge up the
battery (I’m sure I’ve run it down somewhat, not adequately getting any
charge). It seems to run smoother and
have more power (and maybe even corner somewhat better)! Another DUH!
My favorite toy is getting better with age!
Next project is to install the newly rebuilt
calipers, pads and flexible hoses.
Anyway, I’m glad I finally got to this and
will post pictures soon!
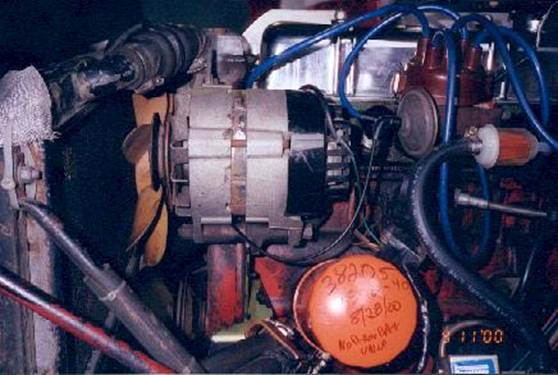
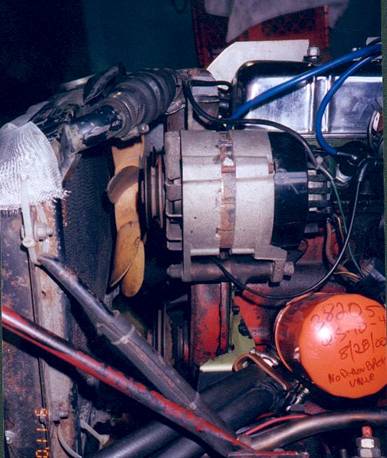
Lucas
alternator shown.
Cast iron bracket (which I drilled larger) shown to rear (right) of front
engine plate below the alternator.
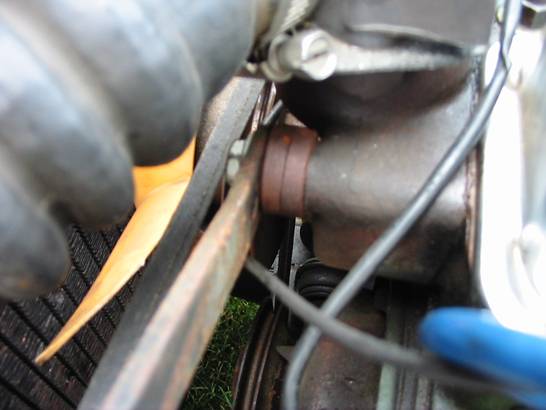
Tight
fit getting to #1 spark plug.
![]()
now
for the Delco pictures…
![]()
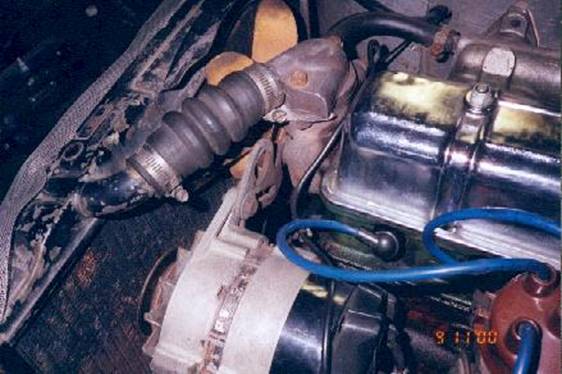
The
“patina” of the engine has recently changed, what you see here is now
gone! 20+ years of rust preventative are
now killing mosquitoes in the wetlands!
See the section (soon to be added) on installation of the oil line to
the cylinder head.
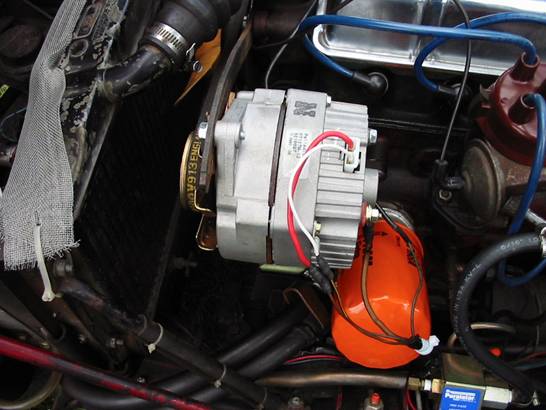
Delco
unit installed. Easy access to the #1
sparking plug.

Delco
unit in place.
Bottom
support bolt with 3 lock/spring washers and a flat washer on bolt-head end, a
locknut on the other end with a flat washer also.
Spacers
on water pump bolt to hold alternator bracket. A new bolt ½” longer is
used. Never-seize on the threads, of
course!
![]()
email from the Spitfire email list detailing the Delco alternator
installation that I am used as a guide:
Subj: Midget 1500 (Spitfire)
Alternator Conversion Completed
Date:
From: michael.graziano@csfb.com (Graziano, Michael)
Sender: owner-spitfires@autox.team.net
Reply-to: michael.graziano@csfb.com (Graziano, Michael)
To: spitfires@autox.team.net
('spitfires@autox.team.net')
All,
I bit the bullet and converted the Midget to
the GM 7127 unit. I believe I used a '78
LaSabre as the PC lookup in the auto parts store. The 7134 also works, but is an 80amp unit
versus the 63amp unit I bought. It was
$40 more.
Parts needed:
1) Alternator - $39.99 plus $15 for the core
charge. It's a lifetime warranteed
DuraLast from AutoZone. Note: I got the
one with the
2) The GM alternator harness plug was 2.39 in
the wiring section.
3) 7" chrome alternator bracket
4) 2 wire connectors (blue for medium sized
wires) to connect two wires.
5) One yellow (large) wire connector with a
circle connection for mounting on a stud on the alternator.
The methodology:
1) Removed the old alternator and both
brackets.
2) Install bottom alternator bracket from a
'75 spitfire. This is the same as the
'78 Midgets, only the portion that mounts to the alternator on the '78 install
is removed. This is essentially a
brace. Picture the solid piece with the
2 boltholes for the block, and the 1" thick hole that mounts to the front
engine plate. The 3" long hole
where the old alternator fits was never cast on this bracket. I think it had something to do with the air pump.
3) Grind off the small lip on the bottom of
the GM alternator. You'll see where it
interferes with the front engine plate.
I used a Dremel and 3 heavy-duty grinding disks. It's a clean enough job that no one will
notice if I ever have to return it. A
hacksaw would have sufficed.
4) Mount the bottom of the new alternator to
the front of the engine plate opposite the bracket you just installed. One bolt goes through the alternator, the
engine plate, and the bracket.
5) Take the old top alternator bracket to the
workbench. Cut off the round loop
section that was previously used to pull the engine. I'll have to find another method when I have to
pull it for the clutch. Also trim the
bend where it interferes with the water pump housing for the method I needed to
install it (see below)
6) Replace the old bracket backwards so that
the bend which previously moved the adjustment section of the bracket towards
the front of the engine bay, now moves it towards the back of the engine bay
(but still pointing towards the driver's side of the car (left hand drive).
7) Install the 7" bracket to the
alternator mounting hole on the top. Install it to the old top bracket. They should line up perfectly. Install the
stock belt, tighten it to spec, and tighten all the bolts.
8) Cut
off the old Lucas alternator harness.
Leave about 2" of wire on the harness in case you ever use drugs
and want to reverse this conversion.
Note: My harness had three
wires. A small gauge solid brown wire, a
small gauge brown and yellow wire, and a large gauge solid brown wire.
"The large Brown wire is the main charging lead. The smaller Brown wire
measures the system voltage to tell the alternator how much to charge. The
Brown/Yellow wire operates the alternator warning light, and provides the
initial voltage to the alternator to start it charging when the engine first
starts," (Dan Masters).
9) Connect the brown and yellow wire to the
#1 wire on the harness plug. The wire number is marked on the alternator, and
the plug is keyed so it can only be installed in one direction. Connect the small solid brown wire to the #2
wire on the harness plug. Connect the
large solid brown wire to the yellow connector, and bolt the yellow connector
to the stud protruding from the back of the alternator housing. The alternator comes with a nut to bolt the
wire down. Make sure you use dielectric
grease on the connections to prevent corrosion.
10) Make sure all the bolts are tight, all
the connections are done, and that the belt is tight and lined up correctly
with the crank and the water pump. It
should be.
11) That's it. Start the car, hook up a volt gauge, and see
the system charge at 14 volts.
My blinkers (which had all the switches and
connections cleaned a few weeks ago) now go "click click click click
click" rather than "click...........click..........click....."
At night with the lights on, the radio on,
the wipers on (fast), the vent fan on, and the hazards on I still had plenty of
charging power. Nice. Very nice.
Michael
'78 Midget
![]()
Email:
me
-----
-----
![]()